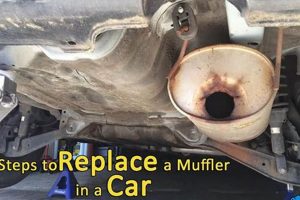
The process involves removing the old, malfunctioning exhaust component and installing a new one. This procedure typically entails disconnecting the old unit from the exhaust system, often requiring the loosening of bolts or clamps. The damaged part is then carefully extracted, and a compatible replacement is secured in its place. Securing the new component usually involves tightening fasteners to ensure a leak-proof connection. A vehicle exhibiting excessive noise, decreased fuel efficiency, or a visible hole in its exhaust system may require this action.
Maintaining a properly functioning exhaust system is critical for optimal vehicle performance and environmental compliance. Addressing issues with this component helps to reduce noise pollution, improve fuel economy, and ensure that emissions are within legal limits. Historically, vehicle owners relied on professional mechanics for this type of repair; however, with increasing availability of information and tools, many individuals are now capable of performing the task themselves, leading to cost savings and increased self-sufficiency.
This discussion will outline the necessary tools, safety precautions, and step-by-step instructions for carrying out this maintenance task. Focus will be given to the proper techniques for removing the old component, preparing the connection points, and installing the new one for optimal performance and longevity.
Essential Considerations for Exhaust System Maintenance
The following points are crucial for a successful and safe exhaust component replacement. Ignoring these recommendations may lead to damage to the vehicle, personal injury, or non-compliance with environmental regulations.
Tip 1: Vehicle Preparation is Paramount. Before commencing any work, ensure the vehicle is properly supported. Use jack stands rated for the vehicles weight and never rely solely on a jack. Engage the parking brake and chock the wheels opposite the working end for added security.
Tip 2: Disconnect the Negative Battery Terminal. This action prevents accidental electrical shorts during the process, safeguarding both the vehicle’s electrical system and the individual performing the work.
Tip 3: Penetrating Oil is Your Ally. Apply penetrating oil to rusted bolts and clamps well in advance of attempting removal. Allow sufficient time for the oil to seep into the threads, minimizing the risk of breakage and simplifying disassembly.
Tip 4: Use Appropriate Tools. Employ the correct wrenches, sockets, and exhaust pipe cutters. Avoid using pliers or adjustable wrenches, as these can damage fasteners and increase the likelihood of slippage.
Tip 5: Inspect Surrounding Components. While the exhaust system is disassembled, thoroughly inspect adjacent components, such as exhaust pipes and hangers. Address any signs of wear or damage proactively to prevent future issues.
Tip 6: Apply Anti-Seize Compound. When installing new fasteners, apply a thin layer of anti-seize compound to the threads. This will facilitate future removal and prevent corrosion.
Tip 7: Tighten Fasteners to Specified Torque. Consult the vehicles repair manual for the correct torque specifications for all fasteners. Overtightening can lead to damage, while undertightening can result in leaks.
Following these guidelines enhances the likelihood of a successful maintenance procedure, ensuring optimal vehicle performance and longevity. This attention to detail translates to a safer and more cost-effective outcome.
Adhering to these best practices is a fundamental aspect of responsible vehicle maintenance and contributes to a more reliable and environmentally sound operation.
1. Preparation
Effective preparation is foundational to a successful exhaust component replacement. It dictates the efficiency, safety, and ultimately, the outcome of the entire process. Inadequate planning can lead to complications such as damaged parts, personal injury, or an improperly installed component. A real-life example illustrates this point: An individual attempts the task without securing the vehicle properly. The vehicle slips off the jack, causing damage to the vehicle and potentially serious injury to the individual. This highlights the criticality of thorough preparation.
Preparation encompasses several critical steps. First, it involves gathering the necessary tools and materials: the correct replacement component, appropriate wrenches and sockets, penetrating oil, safety glasses, gloves, and a torque wrench. Second, the vehicle must be safely secured using jack stands and wheel chocks. Third, a clear and accessible workspace must be established. Neglecting any of these steps can significantly increase the risk of complications. For instance, failure to use penetrating oil on rusted bolts often results in snapped bolts, requiring more extensive and time-consuming repairs. Furthermore, failure to disconnect the battery can lead to electrical shorts during disassembly.
In summary, thorough preparation is not merely a preliminary step; it is an integral component of a successful procedure. Addressing safety concerns, gathering the correct tools, and creating a suitable workspace are crucial for mitigating risks and ensuring an efficient and effective outcome. Proper planning and foresight directly contribute to the quality and longevity of the completed task, preventing future issues and ensuring optimal vehicle performance.
2. Disconnection
Disconnection, within the context of exhaust component replacement, denotes the careful and methodical separation of the old unit from the vehicle’s exhaust system. It is a necessary precursor to removing the worn or damaged part and installing the replacement. Improper disconnection can lead to damage to adjacent exhaust components, creating more extensive repairs. For example, forcefully pulling on a rusted exhaust pipe can cause it to break, requiring welding or complete pipe replacement. The correlation between proper disconnection and a successful replacement is direct and significant. A failure at this stage introduces a cascade of potential complications.
The practical application of this understanding requires a detailed approach. Before initiating disconnection, apply penetrating oil liberally to all fasteners, allowing ample time for it to penetrate and loosen the threads. Identify the specific type of fasteners being used bolts, clamps, or hangers and employ the correct tools to avoid stripping or breaking them. When dealing with rusted components, consider using specialized tools, such as bolt extractors, to minimize the risk of damage. Furthermore, support the exhaust system to prevent it from collapsing once disconnected, which could damage the remaining components.
Effective disconnection minimizes collateral damage, expedites the replacement process, and ensures a secure and leak-free exhaust system. Recognizing the interconnectedness of components and employing the appropriate techniques are essential. The process directly influences the longevity and performance of the new component and the overall integrity of the exhaust system.
3. Extraction
Extraction, in the context of exhaust component maintenance, pertains to the removal of the old, disconnected component from the vehicle. This step is crucial for accommodating the new part and requires careful execution to prevent damage to adjacent structures.
- Spatial Awareness and Obstruction Mitigation
Extraction often involves navigating the component through confined spaces and around other vehicle parts. A methodical approach is essential, carefully maneuvering the component to avoid collisions. For example, exhaust systems are often routed near fuel lines and brake lines; inadvertent contact could compromise these critical systems. The ability to visualize the removal path and proactively address potential obstructions minimizes the risk of damage.
- Leverage and Support Techniques
The component may be held in place by hangers or may be partially seized due to corrosion. Applying gentle leverage and utilizing supporting tools, such as straps, can aid in extraction. An attempt to force the part can result in bent brackets or damaged mounting points. Gradual application of force, coupled with careful observation, is critical.
- Managing Residual Debris and Corrosion
Extraction can dislodge rust, scale, and other debris accumulated within the exhaust system. These materials can interfere with the installation of the new component and may even contaminate the surrounding environment. Collecting debris during extraction and thoroughly cleaning the mating surfaces prior to installation enhances the integrity of the connection and the lifespan of the new component.
- Preservation of Mounting Hardware
Existing mounting hardware, such as bolts and hangers, may be reusable if in good condition. However, forceful extraction can damage this hardware, necessitating replacement. Care should be taken to preserve viable mounting components to avoid unnecessary expenditure and to ensure a secure and proper fit of the new component.
These extraction facets directly affect the success of a exhaust component replacement. A thoughtful strategy, mindful execution, and attention to detail during this phase are essential for a seamless transition to the installation of the new component and the overall performance of the vehicle.
4. Compatibility
Ensuring compatibility is paramount when addressing exhaust component maintenance. Selecting the correct replacement part directly influences the effectiveness of the repair and the overall performance of the vehicle.
- Vehicle-Specific Fitment
A replacement component must be specifically designed for the vehicle’s make, model, and year. The exhaust system design varies significantly across different vehicles, and a component intended for one model will likely not fit correctly on another. Attempting to install an incompatible component can result in improper fitment, exhaust leaks, and potential damage to the exhaust system and surrounding components. Vehicle identification number (VIN) verification is frequently used to determine precise part compatibility.
- Engine Size and Configuration
Exhaust systems are often tailored to the engine’s size and configuration. A V8 engine typically requires a different exhaust system than an inline-4 engine. The diameter of the pipes, the design of the component, and the location of mounting points can all vary based on the engine. Installing a component designed for a different engine can lead to reduced performance, increased noise, and potential damage to the engine. Checking the engine’s specifications and consulting the vehicle’s service manual are vital to part selection.
- Emissions Standards Compliance
Exhaust systems play a critical role in controlling emissions. Replacement components must meet the emissions standards applicable to the vehicle’s model year and location. Using a non-compliant component can result in failure to pass emissions tests and potential legal penalties. Furthermore, it is essential to verify that the replacement component does not alter or bypass any emissions control devices.
- Material and Construction
The material and construction of a replacement component impact its durability and resistance to corrosion. Components made from stainless steel generally offer greater longevity than those made from aluminized steel. The thickness of the metal and the quality of the welds also affect the component’s lifespan. Selecting a component constructed from high-quality materials contributes to the long-term reliability and performance of the exhaust system.
These compatibility facets are not isolated considerations; they represent interconnected elements that collectively determine the suitability of a replacement component. Neglecting any of these factors during the selection process can lead to complications ranging from installation difficulties to long-term performance issues. Diligent attention to compatibility is, therefore, an integral element of ensuring a successful and reliable exhaust component replacement.
5. Installation
The process of securely fitting the new component to the vehicle’s exhaust system is pivotal. Improper installation can negate the benefits of selecting a compatible replacement and compromise the entire repair.
- Alignment and Positioning
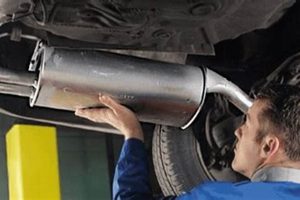
Correct alignment is crucial to prevent exhaust leaks and ensure proper exhaust flow. The component must be positioned accurately to match the existing exhaust system. Misalignment can cause stress on the connecting pipes, leading to premature failure. Proper alignment involves matching the flange or connection points and ensuring that the component is not contacting any other vehicle parts.
- Fastener Engagement and Torque
The correct fasteners, such as bolts, clamps, or hangers, must be used, and they must be tightened to the specified torque. Overtightening can damage the fasteners or the component, while undertightening can lead to leaks. Torque specifications are typically provided in the vehicle’s service manual or with the replacement component. A torque wrench must be used to ensure accurate tightening.
- Sealing Techniques
Gaskets, sealants, or exhaust paste may be required to create a leak-proof seal. These materials fill any imperfections between the connecting surfaces and prevent exhaust gases from escaping. The proper application of sealant is essential. For example, exhaust paste should be applied sparingly to ensure proper sealing without obstructing exhaust flow.
- Hanger and Support Integration
The new component must be properly supported by hangers to prevent stress and vibration. The hangers should be aligned correctly and securely attached to the vehicle’s frame. Inadequate support can lead to premature failure of the component and increased noise and vibration.
These facets of installation are intricately linked to the overall success. Thorough attention to each step ensures a secure, leak-free connection and maximizes the performance and longevity of the replacement component. Neglecting even one aspect can undermine the entire repair, resulting in reduced performance, increased noise, and potential damage to the exhaust system.
6. Securing
The process of securing represents a critical stage in exhaust system maintenance. It dictates the long-term integrity and performance of the replaced component. This phase encompasses the precise tightening and fastening of all connections to ensure a leak-free and structurally sound assembly. Failure to adequately secure all connections results in exhaust leaks, diminished performance, and potential damage to other vehicle systems.
- Torque Specification Adherence
Adhering to specified torque values is essential for proper securing. Overtightening fasteners risks stripping threads or deforming components, while undertightening invites leaks and loosening due to vibration. Vehicle repair manuals provide the correct torque specifications for all fasteners in the exhaust system. The use of a calibrated torque wrench is mandatory to ensure accurate tightening. An example is tightening exhaust manifold bolts without a torque wrench leading to warped manifolds and exhaust leaks.
- Clamp Placement and Tension
Exhaust clamps must be positioned correctly and tightened to the appropriate tension. Improper clamp placement can lead to leaks and premature clamp failure. The clamp should be centered over the joint and tightened evenly to distribute the force. Exhaust clamps must be properly sized for the pipes they join. For example, using a clamp on a section of exhaust that has an improper pipe size will result in vibration, noise and an exhaust leak.
- Hanger Alignment and Attachment
Hangers provide support for the exhaust system and prevent excessive stress on the components. The hangers must be properly aligned and securely attached to the vehicle’s frame. Misaligned or loose hangers can cause the exhaust system to vibrate excessively, leading to leaks and component failure. When replacing exhaust hangers, it is vital to replace damaged or corroded hardware to prevent premature hanger failure.
- Leak Testing and Verification
After all connections are secured, a leak test should be performed to verify the integrity of the system. This can be achieved by starting the engine and listening for exhaust leaks. Soapy water can be sprayed onto the connections to identify leaks. The presence of bubbles indicates an exhaust leak that must be addressed by retightening or resealing the connection. Failure to verify the securing points will cause a failed attempt to replace the muffler, which in return, will not fix the problem.
The act of securing constitutes more than just tightening bolts. It is a comprehensive process that demands adherence to specific procedures and verification of the completed work. The longevity and performance of a exhaust component replacement hinges directly on the quality and thoroughness of the securing stage.
7. Verification
Verification represents the final, crucial stage in the exhaust component replacement procedure. This stage confirms the successful completion of the task and ensures the proper functioning and safety of the exhaust system.
- Leak Detection and Remediation
This process involves a systematic check for exhaust leaks at all connection points. Leaks indicate a failure of the sealing process and can result in reduced engine performance, increased noise, and potential exposure to harmful exhaust gases. Leak detection methods include visual inspection, auditory assessment, and the use of soapy water to identify escaping gases. Any detected leaks must be addressed immediately by tightening connections, replacing gaskets, or re-sealing joints.
- Structural Integrity Assessment
This facet involves a thorough examination of the installed component and its supports to ensure structural integrity. All hangers and mounting points must be secure and properly aligned. The component must not be in contact with any other vehicle parts, as this can cause vibration and premature wear. Any signs of stress or misalignment must be corrected to prevent future failures.
- Noise Level Evaluation
A properly functioning exhaust system reduces engine noise to acceptable levels. Evaluating the noise level after replacement is crucial to confirm the component’s effectiveness. Excessive noise may indicate leaks, improper installation, or a defective component. The noise level should be compared to pre-replacement levels to assess the improvement achieved.
- Emissions Compliance Confirmation
While a complete emissions test may not be feasible immediately, a visual inspection can confirm that the new component does not bypass or alter any emissions control devices. Ensuring compliance with emissions standards is essential for environmental responsibility and legal compliance. Any concerns about emissions compliance should be addressed through a professional emissions test.
These interconnected aspects of verification validate the efficacy of exhaust component replacement. Careful attention to each facet ensures the exhaust system operates safely, efficiently, and in accordance with environmental regulations. Neglecting verification undermines the entire maintenance process, potentially leading to further complications and compromising vehicle performance.
Frequently Asked Questions About Exhaust Component Replacement
The following questions address common concerns and misconceptions regarding the replacement of exhaust components, offering insights based on practical experience and technical expertise.
Question 1: Is professional assistance always required for exhaust component replacement?
Professional assistance is not always mandatory, but proficiency in mechanical repairs, access to necessary tools, and adherence to safety protocols are essential. Individuals lacking these prerequisites should seek professional assistance to prevent potential damage or injury.
Question 2: What are the primary indicators that an exhaust component requires replacement?
Key indicators include excessive exhaust noise, visible damage such as holes or rust, decreased fuel efficiency, and failure to pass emissions inspections. Addressing these symptoms promptly is crucial for maintaining optimal vehicle performance and environmental compliance.
Question 3: Can an incompatible exhaust component cause damage to the vehicle?
Installing an incompatible component can lead to various issues, including exhaust leaks, reduced engine performance, and potential damage to the engine or other exhaust system parts. Ensuring compatibility with the vehicle’s make, model, and year is paramount.
Question 4: What safety precautions must be observed during exhaust component replacement?
Essential safety precautions include using jack stands to support the vehicle, disconnecting the negative battery terminal, wearing safety glasses and gloves, and working in a well-ventilated area. Failure to adhere to these precautions can result in injury or damage to the vehicle.
Question 5: How does the quality of a replacement component affect its longevity?
The quality of the component significantly impacts its lifespan. Components constructed from high-quality materials, such as stainless steel, offer greater resistance to corrosion and typically last longer than those made from less durable materials.
Question 6: What is the significance of torque specifications during exhaust component installation?
Adhering to torque specifications is essential for proper fastener tightness. Overtightening can damage the fasteners or the component, while undertightening can lead to leaks. Consulting the vehicle’s repair manual and using a torque wrench ensures accurate tightening.
In conclusion, proper maintenance is vital. Addressing this task with the correct knowledge, tools, and safety precautions ensures optimal vehicle performance and longevity.
This concludes this comprehensive overview. This information equips individuals with the necessary knowledge to make informed decisions regarding vehicle maintenance.
Concluding Remarks on Exhaust Component Exchange
This exploration detailed the multi-faceted procedure. Proper preparation, safe disconnection, careful extraction, assured compatibility, precise installation, secure fastening, and thorough verification constitute the critical steps. Attention to these areas is essential for successful completion.
Understanding the necessity for responsible vehicle maintenance ensures peak performance and compliance with environmental standards. Continued diligence in applying this knowledge promotes both individual safety and a more sustainable transportation ecosystem.


![Muffler Replacement: How to Replace a Muffler Without Welding [DIY Guide] Best Mufflers for Cars & Trucks | Performance, Sound & Durability Upgrades Muffler Replacement: How to Replace a Muffler Without Welding [DIY Guide] | Best Mufflers for Cars & Trucks | Performance, Sound & Durability Upgrades](https://dnamufflers.com/wp-content/uploads/2025/09/th-767-300x200.jpg)
