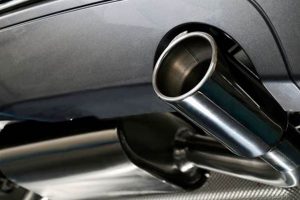
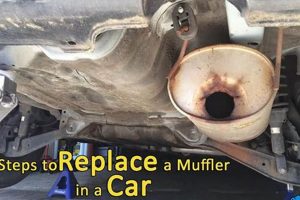
The process involves exchanging a worn or damaged component responsible for sealing the connection between the muffler and other exhaust system parts. This component, typically made of graphite or metal, ensures a leak-proof joint, preventing exhaust gases from escaping before reaching the tailpipe. An example is removing the old, deteriorated component and installing a new one to ensure a proper seal after a muffler repair.
Maintaining an effective seal is crucial for several reasons. It prevents harmful exhaust gases from entering the vehicle cabin, which can pose health risks. A compromised seal can also lead to increased noise levels, reduced engine performance, and decreased fuel efficiency. Historically, failures in this area have been a common cause of vehicle emissions test failures, prompting regular inspection and preventative maintenance.
The subsequent sections detail common failure symptoms, the tools and materials required for performing the procedure, a step-by-step guide to the replacement process, and important safety considerations. Proper execution of these steps ensures optimal exhaust system performance and vehicle longevity.
Essential Considerations for Muffler Gasket Exchange
The following points provide critical guidance to ensure a successful and effective exchange, optimizing vehicle performance and safety.
Tip 1: Selection of Appropriate Replacement: Verify the new component’s specifications match the vehicle’s make, model, and year. Using an incompatible part can result in a poor seal and premature failure. Cross-reference part numbers and consult vehicle-specific repair manuals to confirm compatibility.
Tip 2: Thorough Inspection of Mating Surfaces: Before installing the new component, meticulously inspect the surfaces on the muffler and exhaust pipe. Remove any rust, corrosion, or debris that may prevent a proper seal. Utilize a wire brush or abrasive pad to achieve a clean, smooth surface.
Tip 3: Use of Anti-Seize Compound: Apply a thin, even layer of anti-seize compound to the bolts and studs securing the connection. This prevents future corrosion and facilitates easier removal during subsequent maintenance. Ensure the compound is rated for high-temperature exhaust system applications.
Tip 4: Torque Specification Adherence: Tighten the connecting hardware to the manufacturer’s specified torque. Over-tightening can damage the component or the exhaust system components, while under-tightening can lead to leaks. Use a calibrated torque wrench for accurate measurements.
Tip 5: Post-Installation Leak Test: After completing the exchange, start the vehicle and listen carefully for exhaust leaks around the connection. A hissing or puffing sound indicates a compromised seal. If a leak is detected, re-inspect the connection and re-torque the hardware if necessary.
Tip 6: Consider Professional Assistance: If unfamiliar with automotive repair or lack the necessary tools, seek assistance from a qualified mechanic. Improper installation can lead to safety hazards and further damage to the exhaust system.
Tip 7: Document the Replacement: Keep a record of the component exchanged, the date of service, and any relevant observations. This documentation can be useful for future maintenance and troubleshooting.
Adhering to these considerations ensures a long-lasting and effective seal, preventing exhaust leaks and maintaining optimal vehicle performance. Prioritizing careful execution minimizes the risk of complications and maximizes the lifespan of the repair.
With these critical points addressed, the subsequent sections delve into diagnosing issues indicating the need for this repair, the process of selecting the correct replacement and the actual repalcement steps.
1. Component Degradation
Component degradation is a primary factor necessitating attention to the exhaust system and specifically, the seal between the muffler and exhaust piping. The harsh operating environment subjects these components to constant thermal cycling and exposure to corrosive combustion byproducts, leading to material breakdown and loss of functionality. Understanding the specific facets of this degradation is crucial for effective maintenance.
- Material Deterioration due to Heat
Exhaust systems operate at elevated temperatures, which accelerate the oxidation and weakening of the component materials. Repeated heating and cooling cycles induce stress, causing cracks and fissures to form within the material structure. Over time, this leads to a reduction in the component’s ability to maintain a tight seal, resulting in exhaust leaks.
- Corrosion from Exhaust Gases
The exhaust stream contains acidic compounds that attack the component material. This corrosion weakens the seal, creating pathways for exhaust gases to escape. The rate of corrosion is influenced by factors such as fuel quality, engine operating temperature, and the material composition of the component itself. In coastal regions, the presence of salt in the atmosphere further exacerbates the corrosion process.
- Physical Damage and Erosion
Road debris and impacts can cause physical damage, such as cracks and deformations. This physical damage compromises its structural integrity and affects the ability to maintain a proper seal. Erosion from high-velocity exhaust gases, particularly at the junction between components, can also contribute to degradation over time.
- Compression Set and Loss of Elasticity
The repeated compression and relaxation of the component under clamping forces can lead to a phenomenon known as compression set. Over time, the component loses its elasticity and ability to rebound to its original shape. This results in a reduction in sealing pressure, creating pathways for exhaust leakage.
The cumulative effect of these degradation mechanisms directly impacts the sealing effectiveness. Prompt attention to these issues, involving a strategic exchange, is vital for maintaining exhaust system integrity, preventing emissions violations, and ensuring optimal engine performance. Regular inspection and timely action can mitigate the adverse effects of component degradation and extend the service life of the exhaust system.
2. Sealing Integrity
Sealing integrity, in the context of exhaust systems, directly relies on the condition and functionality of the component intended to create a leak-proof barrier between the muffler and adjacent exhaust piping. Diminished sealing effectiveness stems from several factors, including material fatigue due to thermal stress, corrosion induced by exhaust byproducts, and physical damage from road debris. When this component fails, the exhaust system’s ability to contain and direct gases is compromised, leading to negative consequences for vehicle performance and environmental impact. For instance, a cracked or corroded component allows exhaust gases to escape prematurely, increasing noise levels and potentially exposing vehicle occupants to harmful emissions. A replacement is the direct intervention to restore this critical sealing capability.
The relationship between component integrity and system performance is clearly evident during vehicle emissions testing. A compromised component often results in elevated hydrocarbon and nitrogen oxide readings, leading to test failure and the need for corrective action. Furthermore, an exhaust leak can negatively affect engine performance by disrupting the delicate balance of backpressure within the exhaust system. This disruption can lead to reduced fuel efficiency and decreased power output. Practical examples include a noticeable decrease in acceleration or an increase in fuel consumption after an extended period of driving with a compromised component.
Maintaining sealing integrity through timely interventions is, therefore, essential for ensuring optimal vehicle operation. It prevents harmful emissions, safeguards passenger health, maintains engine performance, and ensures compliance with regulatory standards. A thorough understanding of the factors contributing to degradation, coupled with proactive inspection and replacement, is key to preserving the integrity of the exhaust system and maximizing its service life.
3. Exhaust Leaks
Exhaust leaks directly correlate with the functional condition of the component designed to seal the junction between the muffler and the rest of the exhaust system. A compromised seal permits the escape of exhaust gases before they reach the intended exit point, the tailpipe. This occurrence manifests in various ways, including increased noise levels emanating from the undercarriage, a noticeable odor of exhaust fumes within the vehicle cabin, and a potential decrease in engine performance due to altered backpressure. Addressing exhaust leaks frequently necessitates, or even is directly caused by a worn component.
The implications of unaddressed exhaust leaks extend beyond mere inconvenience. Prolonged exposure to leaking exhaust gases can pose a health risk to vehicle occupants, as these gases contain harmful substances such as carbon monoxide. Furthermore, exhaust leaks can contribute to increased emissions, potentially leading to non-compliance with environmental regulations during vehicle inspections. The location of an exhaust leak also impacts its severity; a leak close to the engine might disrupt sensor readings, further affecting engine performance. For example, an oxygen sensor positioned near an exhaust leak could provide inaccurate data, leading to incorrect fuel mixture adjustments and reduced fuel economy.
Effective identification and remediation of exhaust leaks are thus essential for maintaining vehicle safety, performance, and environmental responsibility. While exhaust leaks can stem from various sources within the exhaust system, a faulty component at the muffler connection is a common culprit. Therefore, a comprehensive inspection of the component is a standard procedure when diagnosing exhaust leaks. The subsequent sections provide a detailed examination of diagnosing, selecting the correct replacement and exchanging it.
4. Correct Installation
The proper exchange of the specified exhaust system component hinges directly on adherence to established installation procedures. Deviations from these procedures can lead to compromised sealing, premature component failure, and potential damage to surrounding exhaust system components. Consider a scenario where the component is installed without proper alignment between the muffler and the exhaust pipe. This misalignment creates stress on the material, potentially leading to cracking and exhaust leaks shortly after the repair. Therefore, meticulous attention to detail during the installation process is essential for achieving a long-lasting and effective repair.
Specific examples of incorrect installation practices include failing to clean mating surfaces prior to installation, neglecting to use appropriate hardware, and applying excessive or insufficient torque to the connecting bolts. The presence of rust or debris on the mating surfaces can prevent the component from seating properly, creating pathways for exhaust leaks. Using incorrect bolts can result in improper clamping force, either damaging the component or failing to create a tight seal. Over-tightening the bolts can distort the component, while under-tightening can allow it to loosen over time. The repercussions can include increased noise, reduced fuel efficiency, and potential failure to meet emissions standards during testing.
In conclusion, the success of the exchange and the long-term performance of the exhaust system are directly linked to the accuracy of the installation. Following established procedures, utilizing appropriate hardware, and adhering to specified torque values are critical steps in ensuring a leak-free and durable repair. Proper installation is not merely a step in the process; it is a fundamental requirement for achieving the intended outcome of exhaust system integrity and optimal vehicle performance.
5. Torque Specification
Torque specification represents a critical parameter in the successful exchange of a component within the exhaust system. The term defines the precise amount of rotational force, typically measured in foot-pounds or Newton-meters, to be applied when tightening the fasteners securing the component. Its relevance stems from the direct impact on the sealing performance and the structural integrity of the connection. Insufficient torque may result in an incomplete seal, leading to exhaust leaks, increased noise levels, and potential environmental concerns. Conversely, excessive torque can cause deformation or fracture of the component or the connecting hardware, creating similar or more severe issues. Therefore, adhering to the manufacturer’s specified torque represents a preventative measure against both under-tightening and over-tightening, ensuring optimal functionality and longevity.
Real-world examples underscore the practical significance of correct torque application. Consider a scenario where a technician, lacking a torque wrench or neglecting the specified value, over-tightens the bolts during an exchange. This action can compress the component beyond its design limit, causing it to lose its elasticity and eventually fail. Alternatively, insufficient torque can allow the fasteners to loosen over time due to vibration and thermal expansion, ultimately leading to an exhaust leak. In both instances, the need for a subsequent repair arises, resulting in added expense and inconvenience. Furthermore, the ramifications can extend beyond the immediate connection. Excessive stress on exhaust manifold bolts, for instance, can cause fractures in the exhaust manifold itself, resulting in a more complex and costly repair.
In summary, torque specification is inextricably linked to the successful and durable replacement of the designated component. Its adherence ensures the creation of a leak-proof seal, prevents premature component failure, and safeguards against damage to other exhaust system elements. While the exchange procedure itself may appear straightforward, the importance of correct torque application cannot be overstated. Neglecting this parameter introduces a significant risk of compromising the repair, diminishing vehicle performance, and potentially leading to further complications. Therefore, a torque wrench calibrated according to established standards and used with the correct torque value is an essential tool for this procedure.
Frequently Asked Questions
The following section addresses common inquiries concerning the procedure, providing clarifications and insights.
Question 1: What are the primary indicators signaling the need for muffler gasket replacement?
Audible exhaust leaks, often characterized by a hissing or roaring sound emanating from the undercarriage, are a primary symptom. A noticeable increase in exhaust fumes within the vehicle cabin may also indicate a compromised seal. Visual inspection may reveal physical damage, such as cracks or corrosion, around the connection point.
Question 2: Can a muffler gasket be reused after removal?
Generally, it is not recommended to reuse this component. The component undergoes compression and deformation during its initial installation, adapting to the specific contours of the mating surfaces. Attempting to reuse the component typically results in an imperfect seal, potentially leading to exhaust leaks and requiring a subsequent, expedited exchange.
Question 3: What type of tools are essential for performing this replacement?
Essential tools include a wrench or socket set appropriate for the fastener sizes involved, a torque wrench for tightening the fasteners to the specified torque, a penetrating oil to loosen corroded fasteners, and safety glasses and gloves for personal protection. A wire brush may be necessary to clean the mating surfaces prior to installation.
Question 4: Is it necessary to replace the muffler when replacing this component?
The necessity to replace the muffler concurrently depends on the condition of the muffler itself. If the muffler exhibits significant corrosion, physical damage, or internal deterioration, it may be prudent to replace it simultaneously. However, if the muffler is in otherwise good condition, replacing only the component may be sufficient.
Question 5: What potential risks are associated with performing this repair without proper knowledge or experience?
Potential risks include improper installation, leading to exhaust leaks and potential damage to exhaust system components. Over-tightening fasteners can damage the components or hardware. Working with exhaust systems can present risks of burns from hot components or exposure to harmful exhaust gases. Seek professional assistance if inexperienced or unqualified.
Question 6: How frequently should the condition of the muffler gasket be inspected?
The condition of the component should be inspected periodically, ideally during routine vehicle maintenance services such as oil changes or tire rotations. More frequent inspections may be warranted in regions with harsh climates or where road salt is commonly used.
Regularly changing this worn component helps ensure the integrity of the exhaust system. As such, it promotes optimal engine performance and emissions control.
The next section explains the process of selecting a compatible replacement.
Conclusion
This discussion explored the critical function of muffler gasket replacement in maintaining exhaust system integrity. Key considerations encompass component degradation, sealing effectiveness, exhaust leak prevention, proper installation techniques, and adherence to torque specifications. Neglecting these aspects invites performance deficits, environmental risks, and potential safety hazards. Consistent and appropriate action ensures the vehicle operates optimally.
The long-term reliability and performance of a vehicle are inextricably linked to diligent maintenance practices. The exchange of this component is a small but important aspect of overall care. Prudent vehicle owners are advised to heed the warning signs and take preemptive action, thereby safeguarding both their investment and the environment. Continued vigilance and responsible intervention remain paramount.


![Muffler Replacement: How to Replace a Muffler Without Welding [DIY Guide] Best Mufflers for Cars & Trucks | Performance, Sound & Durability Upgrades Muffler Replacement: How to Replace a Muffler Without Welding [DIY Guide] | Best Mufflers for Cars & Trucks | Performance, Sound & Durability Upgrades](https://dnamufflers.com/wp-content/uploads/2025/09/th-767-300x200.jpg)
