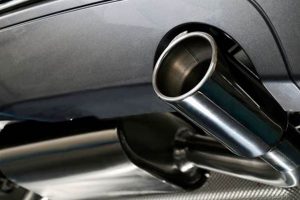
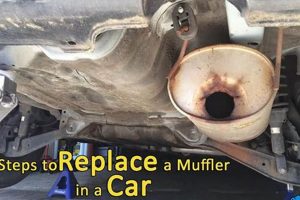
The process involves removing the existing exhaust component located at the rear of the specified vehicle model and year, and installing a new one in its place. This task typically requires disconnecting the muffler from the exhaust pipe, detaching it from its mounting points, and then reversing the steps with the new component, ensuring proper alignment and secure connections.
Performing this replacement is crucial for maintaining vehicle emission standards, reducing exhaust noise, and preventing potential safety hazards associated with a damaged or corroded exhaust system. A functioning muffler contributes to a quieter and more environmentally friendly driving experience. Furthermore, addressing this issue promptly can prevent further damage to other exhaust system components, potentially saving on repair costs in the long run.
This article will outline the specific tools and steps required for this procedure, emphasizing safety precautions and best practices to ensure a successful and durable repair. The following sections will cover necessary tools, step-by-step instructions, and tips for addressing common challenges encountered during the replacement.
Tips for Replacing the 2004 Honda CRV Rear Muffler
The following tips are designed to enhance the success and longevity of a rear muffler replacement on a 2004 Honda CRV. Adhering to these guidelines can prevent common errors and ensure a secure, leak-free installation.
Tip 1: Penetrating Lubricant Application: Apply penetrating lubricant to all bolts and connections well in advance of attempting removal. Allow ample soak time, typically 30 minutes or more, to loosen corroded fasteners. Multiple applications may be necessary.
Tip 2: Proper Exhaust Hanger Removal: Utilize exhaust hanger removal pliers to dislodge rubber hangers. Avoid excessive force or prying with screwdrivers, which can damage the hangers or surrounding components. Silicone spray can also aid in hanger removal.
Tip 3: Accurate Measurement of Exhaust Pipe: Prior to cutting the exhaust pipe, if necessary, measure the pipe diameter to ensure proper fitment of the replacement muffler. Incorrect measurements can lead to leaks or incompatibility.
Tip 4: Secure Clamping and Sealing: Use new exhaust clamps designed for the specified pipe diameter. Tighten the clamps to the manufacturer’s recommended torque specifications to ensure a secure and leak-free seal. Exhaust sealant paste may also be used at joints.
Tip 5: Muffler Alignment: Ensure proper muffler alignment to prevent contact with the vehicle’s frame or suspension components. Adjust the hangers as needed to achieve optimal clearance and prevent rattling.
Tip 6: Torque Specification Adherence: Consult the vehicle’s service manual for the correct torque specifications for all bolts and fasteners. Over-tightening can damage the components, while under-tightening can lead to leaks or loosening.
Tip 7: Post-Installation Inspection: After installation, start the engine and inspect for exhaust leaks. Pay close attention to the connections and joints. Listen for any unusual noises or vibrations.
By following these tips, the replacement process can be streamlined, resulting in a durable and effective repair. Proper preparation and attention to detail are key to a successful outcome.
The subsequent sections of this guide will delve into detailed procedures for troubleshooting common issues encountered during the task.
1. Tools
The successful replacement of a rear muffler on a 2004 Honda CRV hinges significantly on the availability and correct utilization of appropriate tools. The right tools not only streamline the process but also minimize the risk of damage to surrounding components and ensure a secure and lasting repair.
- Socket Set and Wrenches
A comprehensive socket set and wrench set, including both metric sizes relevant to the 2004 Honda CRV, are indispensable. These tools are required for loosening and tightening the bolts and fasteners that secure the muffler and its associated hardware. Having a variety of sizes and configurations, such as deep sockets and extensions, is essential for accessing hard-to-reach areas. The absence of the correct size socket can lead to stripped bolts and significant delays.
- Penetrating Oil
Corrosion is a common issue in exhaust systems. Penetrating oil is crucial for loosening rusted or seized bolts and exhaust hangers. Applying penetrating oil liberally and allowing sufficient soak time significantly reduces the risk of breaking bolts during removal. The use of heat in conjunction with penetrating oil can further enhance its effectiveness.
- Exhaust Hanger Removal Pliers
Exhaust systems are typically suspended by rubber hangers. Removing these hangers can be challenging without specialized pliers. These pliers are designed to compress the rubber hanger, allowing it to slip off the retaining studs. Attempting to remove the hangers with screwdrivers or other improvised tools can damage the hangers or the exhaust system.
- Jack and Jack Stands
Raising the vehicle safely is paramount. A hydraulic jack is necessary to lift the 2004 Honda CRV, and jack stands are essential for providing stable support while working underneath the vehicle. Never work under a vehicle supported only by a jack. Proper placement of the jack stands on designated jacking points is critical to prevent damage to the vehicle’s frame.
In summary, the availability and correct application of these tools are pivotal for the effective replacement of the rear muffler on a 2004 Honda CRV. Neglecting to use the appropriate tools can lead to complications, increased repair time, and potential damage to the vehicle.
2. Safety
Prioritizing safety is paramount when replacing the rear muffler on a 2004 Honda CRV. The potential risks associated with working under a vehicle and handling exhaust system components necessitate strict adherence to safety protocols to prevent injury and ensure a secure working environment. Improper safety measures can result in severe consequences, highlighting the critical importance of this aspect.
- Vehicle Support and Stability
The use of jack stands is non-negotiable. Relying solely on a jack to support the vehicle presents a significant risk of collapse, potentially leading to serious injury or fatality. Jack stands must be placed on designated jacking points on the vehicle’s frame, as specified in the vehicle’s service manual. Confirming the stability of the vehicle before commencing any work underneath is essential. Inspecting the jack stands for any signs of damage or wear is also a necessary precaution.
- Personal Protective Equipment (PPE)
Appropriate PPE, including safety glasses, gloves, and hearing protection, is crucial. Safety glasses protect against debris that may dislodge during the removal process, such as rust or fragments of the old exhaust system. Gloves protect hands from sharp edges, hot surfaces, and exposure to potentially harmful substances. Hearing protection mitigates the noise generated by power tools or the exhaust system itself. Failure to use PPE can result in eye injuries, cuts, burns, or hearing damage.
- Working with Exhaust Fumes
Exhaust fumes contain carbon monoxide, a colorless and odorless gas that is highly toxic. The replacement process should be conducted in a well-ventilated area to minimize exposure to exhaust fumes. If working indoors, ensure adequate ventilation by opening doors and windows, or using an exhaust fan. Prolonged exposure to carbon monoxide can lead to serious health problems or even death. Under no circumstances should the engine be run for extended periods in a confined space.
- Handling Hot Components
The exhaust system can remain hot for a considerable period after the engine has been turned off. Allowing sufficient time for the exhaust system to cool down is crucial to prevent burns. If immediate work is necessary, heat-resistant gloves should be used to handle any hot components. Water should never be used to cool down the exhaust system, as rapid temperature changes can cause warping or cracking.
The integration of these safety measures into the muffler replacement process is not merely a recommendation but a fundamental requirement. Adherence to these protocols mitigates risks, protects individuals from potential harm, and ensures a safe and efficient completion of the task. A comprehensive understanding of these safety considerations is as vital as the technical skills required for the replacement itself.
3. Removal
The “Removal” phase is a critical juncture in the procedure to replace a rear muffler on a 2004 Honda CRV. A successful removal is directly correlated with the ease and effectiveness of the subsequent installation. Improper removal techniques can lead to damaged components, increased repair time, and compromised integrity of the new installation.
- Disconnecting Mounting Hardware
The initial step in the removal process involves disconnecting the bolts, clamps, and other fasteners that secure the muffler to the exhaust system and vehicle frame. The application of penetrating oil is often necessary to overcome corrosion. Broken bolts are a common occurrence and necessitate specialized extraction tools. Careless removal can damage the surrounding exhaust piping or mounting points, requiring additional repairs.
- Detaching Exhaust Hangers
The 2004 Honda CRV muffler is typically suspended by rubber exhaust hangers. These hangers must be detached to free the muffler from the vehicle. The use of exhaust hanger removal pliers is recommended to minimize the risk of damage to the hangers. Attempting to pry the hangers off with screwdrivers can result in tears or breaks, necessitating replacement of the hangers. Damage to the hangers can also induce unwanted vibrations and noise post-installation.
- Separating the Muffler from the Exhaust Pipe
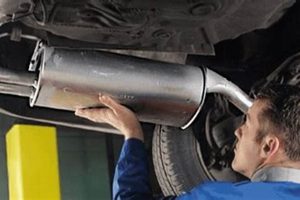
The muffler connects to the exhaust pipe, typically via a flange or slip-fit connection. Corrosion can make separation difficult. If the connection is severely corroded, cutting the exhaust pipe may be required. Accurate measurement and a clean cut are essential to ensure a proper fit with the new muffler. Inadequate separation can lead to exhaust leaks and reduced performance.
- Safe Handling and Disposal
The removed muffler may be heavy and contain rust, debris, and potentially harmful substances. Proper handling techniques are essential to prevent injury. Wearing gloves is recommended. The disposal of the old muffler must adhere to local environmental regulations. Discarding the muffler improperly can result in environmental contamination.
The “Removal” stage of the rear muffler replacement for a 2004 Honda CRV is not merely a disassembly process but a careful operation that directly impacts the success of the entire repair. Skillful execution of each facet of the removal process contributes to a seamless transition to the installation phase and ensures the long-term reliability of the exhaust system.
4. Installation
The installation phase is the direct culmination of the preceding removal steps when addressing how to replace 2004 honda crv rear muffler. The success of the entire endeavor hinges on the precise and secure installation of the new component, adhering to proper techniques and specifications.
- Component Alignment and Positioning
Prior to securing any fasteners, the replacement muffler must be correctly aligned with the existing exhaust system. Misalignment can induce stress on the connections, leading to premature failure and exhaust leaks. Ensuring that the muffler sits properly within its designated mounting points is critical. Real-world examples of improper alignment manifest as rattles, vibrations, or a visible offset between the muffler and the vehicle’s undercarriage. This step directly impacts the longevity and performance of the exhaust system.
- Secure Fastening Techniques
The method used to fasten the muffler to the exhaust system whether through clamps, bolts, or welding dictates the integrity of the connection. New hardware, including bolts, nuts, and clamps, should always be used. Torque specifications, as outlined in the vehicle’s service manual, must be strictly adhered to. Over-tightening can strip threads and damage components, while under-tightening can lead to leaks. Examples include the use of specialized exhaust clamps designed for the specific pipe diameter and the correct application of anti-seize compound on threaded fasteners to prevent future corrosion.
- Exhaust Hanger Attachment
The rubber exhaust hangers play a crucial role in isolating vibrations and supporting the muffler. Attaching the muffler to the hangers correctly ensures that the weight of the component is properly distributed and that vibrations are dampened. Damaged or deteriorated hangers should be replaced. The incorrect attachment of hangers can result in excessive movement, noise, and potential damage to the exhaust system or surrounding components. The use of silicone spray can aid in the proper insertion of hangers onto their mounting points.
- Leak Testing and Verification
Following the physical installation, a thorough leak test is essential. This involves starting the engine and carefully inspecting all connections for any signs of exhaust leakage. This can be done by listening for hissing sounds or feeling for escaping exhaust gases. Applying soapy water to the connections can help to visually identify even small leaks. Addressing any leaks immediately is crucial to ensure optimal performance, fuel efficiency, and to prevent the entry of harmful exhaust gases into the vehicle’s cabin.
The successful completion of the installation phase, incorporating proper alignment, secure fastening, correct hanger attachment, and thorough leak testing, guarantees the optimal performance and longevity of the replaced muffler, directly fulfilling the objective of how to replace 2004 honda crv rear muffler. Neglecting any of these facets can compromise the integrity of the exhaust system and necessitate future repairs.
5. Sealing
Effective sealing is intrinsically linked to a successful rear muffler replacement on a 2004 Honda CRV. Improper sealing results in exhaust leaks, diminishing the effectiveness of the muffler and introducing a range of potential problems. The primary cause is the imperfect mating of surfaces between the muffler and the existing exhaust piping. This imperfection, often exacerbated by corrosion or manufacturing tolerances, creates pathways for exhaust gases to escape.
The importance of proper sealing during the muffler replacement procedure cannot be overstated. Exhaust leaks not only reduce engine performance and fuel efficiency but also introduce harmful gases, such as carbon monoxide, into the vehicle’s environment. Consider a scenario where the clamp connecting the muffler to the exhaust pipe is not tightened sufficiently, or the mating surfaces are not adequately cleaned. This results in a persistent hissing sound emanating from the connection point, accompanied by a noticeable drop in engine power. Addressing this issue promptly is essential to prevent further complications and ensure passenger safety.
In summary, effective sealing is not a supplementary step, but a core component of the replacement. Its omission or inadequate execution undermines the purpose of the entire procedure. By meticulously preparing the mating surfaces, employing appropriate sealing compounds, and ensuring secure connections, the integrity of the exhaust system is maintained, safeguarding vehicle performance, fuel economy, and the well-being of its occupants. This emphasis on sealing directly contributes to the long-term effectiveness of the muffler replacement.
6. Alignment
Alignment, in the context of “how to replace 2004 honda crv rear muffler,” refers to the precise positioning and orientation of the new muffler relative to the existing exhaust system and the vehicle chassis. Proper alignment is not merely a cosmetic concern; it is crucial for ensuring optimal performance, preventing premature wear, and avoiding potential safety hazards.
- Exhaust Pipe Interface Alignment
The connection point between the replacement muffler and the existing exhaust pipe must be accurately aligned to ensure a secure and leak-free seal. Misalignment at this interface can result in exhaust leaks, reduced engine performance, and potential damage to the catalytic converter. An example of this is when the muffler inlet pipe is not coaxial with the exhaust pipe; clamping it together will place undue stress on the connection, causing premature failure of the joint or the exhaust pipe itself.
- Hanger Bracket Alignment
The hanger brackets on the replacement muffler must align precisely with the corresponding mounting points on the vehicle’s chassis. Misaligned hangers can cause the muffler to vibrate excessively, leading to noise and potential damage to the exhaust system or surrounding components. In a real-world scenario, a muffler hanging too low due to misaligned brackets can strike speed bumps or other obstacles, causing physical damage and potentially dislodging the muffler.
- Chassis Clearance Alignment
The muffler must be aligned to maintain adequate clearance from the vehicle’s chassis and other undercarriage components. Insufficient clearance can result in the muffler striking these components, causing noise, vibration, and potential damage to both the muffler and the vehicle. For example, if the muffler is positioned too close to the fuel tank, the heat generated by the exhaust system could potentially create a fire hazard. Proper alignment ensures safe operating temperatures and prevents physical contact.
- Flow Direction and Internal Structure Alignment
Some aftermarket mufflers may have internal baffling or directional flow designs. Correct alignment ensures that the exhaust flow proceeds as intended, maximizing noise reduction and minimizing backpressure. An incorrectly aligned muffler might create turbulence or excessive backpressure, potentially affecting engine performance. Therefore, identifying and respecting flow direction markings, if present, is a crucial aspect of achieving correct overall alignment.
These facets of alignment collectively underscore the critical role it plays in “how to replace 2004 honda crv rear muffler.” Neglecting proper alignment can compromise the functionality and longevity of the replacement, leading to a cascade of potential issues ranging from reduced performance to safety concerns. A meticulous approach to alignment is therefore essential for a successful and durable muffler replacement.
Frequently Asked Questions
The following questions address common concerns and uncertainties related to the replacement of the rear muffler on a 2004 Honda CRV. The answers provided are intended to offer clear and concise guidance based on industry best practices and technical considerations.
Question 1: What tools are absolutely essential for completing this replacement?
A comprehensive socket set (metric), a wrench set, penetrating oil, exhaust hanger removal pliers, a hydraulic jack, and jack stands are considered essential. Specific socket sizes will vary depending on the fasteners used on the original and replacement components. Failure to use appropriate tools may result in damaged components or personal injury.
Question 2: Is it safe to perform this replacement without prior automotive repair experience?
While the procedure is relatively straightforward, a degree of mechanical aptitude is required. Individuals without prior experience should exercise extreme caution and consider seeking assistance from a qualified technician. The potential for injury exists when working under a vehicle and handling exhaust system components.
Question 3: How can rusted bolts be effectively removed without causing damage?
Liberally apply penetrating oil to the rusted bolts well in advance of attempting removal, allowing ample soak time. In cases of extreme corrosion, heat may be applied cautiously using a propane torch to expand the metal and aid in loosening the bolt. If the bolt head is severely damaged, bolt extractor tools may be necessary.
Question 4: What are the potential consequences of neglecting to replace worn or damaged exhaust hangers?
Worn or damaged exhaust hangers can lead to excessive vibration, noise, and potential damage to the exhaust system. This can also cause the muffler to impact the vehicle’s undercarriage. Replacement hangers are inexpensive and should be replaced concurrently with the muffler.
Question 5: What type of sealant, if any, is recommended for use on the muffler connections?
High-temperature exhaust sealant paste is recommended for application at the muffler connections. This sealant creates a gas-tight seal and prevents exhaust leaks. Follow the manufacturer’s instructions for application and curing time.
Question 6: How can exhaust leaks be effectively detected after the replacement is complete?
Start the engine and carefully listen for hissing sounds near the muffler connections. Applying soapy water to the connections can also help to identify leaks by the formation of bubbles. Any detected leaks must be addressed immediately to ensure proper exhaust system function.
These frequently asked questions provide a baseline understanding of the considerations surrounding the replacement of a rear muffler on a 2004 Honda CRV. Consulting the vehicle’s service manual and seeking professional guidance remains prudent.
The following section outlines a step-by-step procedure for the muffler replacement process, building upon the information presented herein.
Conclusion
The preceding analysis has delineated the multifaceted aspects of how to replace 2004 honda crv rear muffler. From the necessity of employing appropriate tools and adhering to strict safety protocols to the critical importance of proper alignment and sealing, each stage of the process demands meticulous attention to detail. The information presented emphasizes that a successful muffler replacement extends beyond simply exchanging components; it requires a comprehensive understanding of the underlying principles that govern exhaust system functionality.
The diligence exercised during this procedure directly influences the vehicle’s performance, environmental impact, and the safety of its occupants. Therefore, whether undertaking this task independently or entrusting it to a qualified professional, the principles outlined herein should serve as a foundational guide. Prioritizing precision and adherence to established best practices will ensure a lasting and effective resolution.


![Muffler Replacement: How to Replace a Muffler Without Welding [DIY Guide] Best Mufflers for Cars & Trucks | Performance, Sound & Durability Upgrades Muffler Replacement: How to Replace a Muffler Without Welding [DIY Guide] | Best Mufflers for Cars & Trucks | Performance, Sound & Durability Upgrades](https://dnamufflers.com/wp-content/uploads/2025/09/th-767-300x200.jpg)
