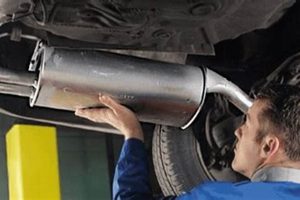
The process of removing a vehicle’s existing exhaust silencing device and installing a new one is a common maintenance task. This procedure typically involves disconnecting the old component from the exhaust system, often requiring the use of tools to loosen or remove fasteners, and then securing the new component in its place. For example, a rusted and failing component can be exchanged for a new one designed to reduce engine noise and comply with local regulations.
Maintaining a functional exhaust silencing system is important for minimizing noise pollution and ensuring vehicle compliance with noise regulations. A properly functioning unit also contributes to overall vehicle performance by allowing for optimal exhaust gas flow. Historically, advancements in silencing technology have led to quieter vehicles and improved community living standards.
Understanding the necessary steps for this replacement, including safety precautions, required tools, and the correct installation methods, is essential for successful completion. Detailed instructions on these aspects are provided below, offering a comprehensive guide to the entire undertaking.
Replacement Procedure Tips
The following guidelines aim to improve the efficacy and safety of the exhaust silencing device exchange process.
Tip 1: Prioritize Safety. Always use jack stands to support the vehicle after lifting it with a jack. Do not work under a vehicle supported only by a jack.
Tip 2: Apply Penetrating Oil. Generously apply penetrating oil to rusted bolts and connections well in advance of attempting removal. This can significantly ease the process.
Tip 3: Use the Correct Tools. Employ appropriately sized wrenches and sockets to prevent rounding off nuts and bolts. Damaged fasteners can complicate the replacement significantly.
Tip 4: Inspect Exhaust Hangers. Examine the condition of rubber exhaust hangers. Replace any that are cracked or deteriorated to ensure proper support of the new component.
Tip 5: Apply Anti-Seize Compound. Use anti-seize compound on threads during reassembly. This facilitates easier removal in the future.
Tip 6: Ensure Proper Alignment. Before tightening all connections, verify that the new component is properly aligned with the exhaust system to prevent stress and leaks.
Tip 7: Check for Exhaust Leaks. After installation, start the engine and carefully inspect all connections for exhaust leaks. Address any leaks immediately.
Adhering to these recommendations can contribute to a safer and more efficient replacement, minimizing potential complications.
The next section outlines the essential tools required for completing this task.
1. Vehicle Safety
The correlation between vehicle safety and the exchange of an exhaust silencing device is paramount. Incorrectly performing this maintenance task poses significant risks to the individual undertaking the work and to the vehicle itself. Failure to properly secure the vehicle with jack stands after lifting it with a jack, for instance, can lead to catastrophic injury if the vehicle slips. Inadequate eye protection can result in eye damage from debris dislodged during the process. These scenarios underscore the direct cause-and-effect relationship between adherence to safety protocols and the prevention of harm during the replacement.
Vehicle safety also encompasses ensuring the vehicle is stable and will not move while work is being performed. This often involves chocking the wheels opposite the end of the vehicle being lifted. Additionally, working in a well-ventilated area is crucial to mitigate the risks associated with exposure to exhaust fumes. Neglecting these precautions can lead to carbon monoxide poisoning. The use of gloves is advisable to protect the hands from sharp edges, hot surfaces, and potentially hazardous materials present on the exhaust system. Each safety measure is a crucial component in the overall process.
In summary, prioritizing vehicle safety is not merely a supplementary consideration, but an integral aspect of the muffler replacement procedure. The potential consequences of neglecting these safety measures range from minor injuries to life-threatening situations. Strict adherence to established safety protocols is therefore non-negotiable for a successful and safe outcome.
2. Proper Tools
Employing the correct tools is critical for the efficient and safe exchange of an exhaust silencing device. The absence of appropriate tools can lead to damaged components, increased risk of injury, and an unsuccessful completion of the task. Selection and use of these implements directly affects the outcome and the integrity of the vehicle’s exhaust system.
- Socket Set and Wrenches
A comprehensive set of sockets and wrenches is necessary for removing and installing fasteners of various sizes. SAE and metric sizes are often required, depending on the vehicle’s manufacturer. Improperly sized tools can round off bolt heads, making removal exceedingly difficult, potentially necessitating the use of specialized extraction tools or, in severe cases, professional assistance. This directly impacts the efficiency and cost of the replacement.
- Penetrating Oil
Penetrating oil is essential for loosening corroded or rusted fasteners. Applying penetrating oil well in advance of attempting removal allows it to seep into the threads and break down the corrosion. Failure to use penetrating oil can result in broken bolts or damaged exhaust components, significantly prolonging the replacement and potentially requiring welding or cutting of the exhaust system.
- Exhaust Hanger Removal Tool
This specialized tool simplifies the removal of rubber exhaust hangers. Attempting to remove hangers with conventional tools can damage the rubber, requiring replacement of the hangers themselves. Using the correct tool minimizes the risk of damage and speeds up the replacement.
- Torque Wrench
A torque wrench is essential for tightening fasteners to the manufacturer’s specified torque. Over-tightening can damage threads or distort exhaust flanges, leading to leaks. Under-tightening can cause fasteners to loosen over time, also resulting in leaks and potential exhaust system failure. Proper torque is crucial for ensuring a secure and leak-free installation.
In conclusion, the availability and proper utilization of these tools are not merely conveniences, but necessities for a successful exhaust silencing device replacement. Without them, the risk of complications, damage, and injury increases significantly, highlighting the integral role proper tools play in the entire process.
3. Fastener Loosening
Effective fastener loosening is a prerequisite for the successful exchange of an exhaust silencing device. Corroded or seized fasteners represent a significant obstacle during this procedure, potentially leading to damage to the exhaust system and increased labor. The process of loosening these fasteners directly impacts the efficiency and safety of the overall task.
- Penetrant Application
The application of a quality penetrating oil is critical to facilitate fastener loosening. Allowing adequate soak time, typically several hours or overnight, maximizes the effectiveness of the penetrant. The oil seeps into the threads, breaking down rust and corrosion, reducing friction and making removal more feasible. Failure to use a penetrant often results in stripped or broken fasteners, significantly complicating the process.
- Heat Application
In cases of severe corrosion, applying heat can aid in fastener loosening. A propane or butane torch can be used to carefully heat the fastener, causing it to expand slightly and break the bond of corrosion. Precautions must be taken to avoid damaging surrounding components or creating a fire hazard. Direct application of heat to flammable materials must be avoided.
- Impact Tools
Impact wrenches or impact drivers can be employed to deliver bursts of high torque, which can be effective in loosening stubborn fasteners. These tools utilize a hammering action to overcome resistance. However, careful use is essential to prevent rounding off or breaking the fastener. It is important to use impact-rated sockets designed to withstand the forces generated by these tools.
- Extraction Techniques
When fasteners are severely damaged or broken, specialized extraction techniques may be required. These techniques include the use of bolt extractors, which grip the exterior of the fastener, or screw extractors, which bore into the center of the fastener. The appropriate technique depends on the extent of the damage and the accessibility of the fastener. Improper extraction can further damage the surrounding components, necessitating more extensive repairs.
The success of the exhaust silencing device exchange hinges on effective fastener loosening. Employing the appropriate methods and tools, coupled with patience and caution, minimizes the risk of damage and facilitates a smoother, more efficient replacement process.
4. Component Alignment
Proper component alignment is an essential element during the replacement of an exhaust silencing device. Incorrect alignment can create stress on the exhaust system, leading to premature wear, leaks, and reduced performance. The causal relationship is direct: misaligned components induce undue strain, resulting in material fatigue and eventual failure. A real-world example would be a situation where an exhaust silencing device is installed at an angle, placing excessive pressure on the connecting pipes and welds. This pressure can lead to cracks in the pipes or breaks in the welds, requiring further repairs.
During the installation process, all connecting points must be carefully aligned before tightening any fasteners. This involves ensuring that the replacement component matches the original component in terms of length, diameter, and mounting points. The exhaust hangers must also be correctly positioned to support the weight of the new silencing device without placing stress on the joints. Practical applications of this understanding include taking careful measurements before installation and using appropriate shims or spacers to achieve proper alignment. Neglecting these steps can result in significant performance issues and costly repairs down the line.
In summary, component alignment is not simply a cosmetic consideration but a critical factor in the long-term functionality and durability of the exhaust system. Addressing alignment issues proactively during the replacement process can prevent future problems and ensure optimal vehicle performance. Challenges may arise when dealing with aftermarket components that do not perfectly match the original equipment specifications. However, by focusing on precise alignment and carefully adjusting mounting points, these challenges can be overcome, ensuring a successful and reliable replacement.
5. Leak Prevention
Effective leak prevention is a crucial aspect of exhaust silencing device replacement. Failure to properly seal connections within the exhaust system results in reduced engine performance, increased noise levels, and potential safety hazards. Meticulous attention to sealing methods and materials is therefore paramount.
- Gasket Integrity
The condition of gaskets at connecting points directly impacts leak prevention. Worn or damaged gaskets should be replaced with new components designed to withstand high temperatures and exhaust gases. An example is the flange gasket connecting the exhaust silencing device to the intermediate pipe; a degraded gasket will allow exhaust to escape, creating noise and potentially affecting emissions.
- Sealer Application
Application of a high-temperature exhaust sealant can enhance leak prevention at slip-fit connections. This sealant fills minor imperfections and creates a tighter seal. An instance is the connection between the exhaust silencing device and the tailpipe; applying sealant before clamping can prevent leaks caused by minor irregularities in the pipe surfaces.
- Clamp Tightening
Proper tightening of clamps is essential for maintaining a secure seal. Over-tightening can damage the pipes or clamps, while under-tightening may not provide sufficient compression. Correct torque specifications should be adhered to when tightening clamps to ensure optimal sealing without causing damage. The U-bolt clamps connecting the exhaust silencing device to the exhaust pipes are a prime example; insufficient tightening will result in leaks, while excessive force can crush the pipes.
- Weld Quality
For exhaust systems with welded connections, weld quality is critical for leak prevention. Porous or cracked welds will allow exhaust gases to escape. Visual inspection of welds is necessary to identify any defects. If leaks are detected, re-welding may be required. The welds attaching the exhaust silencing device to the inlet and outlet pipes are especially vulnerable; any imperfections will compromise the system’s integrity.
In conclusion, leak prevention is an integral element of the exhaust silencing device replacement procedure. Addressing gasket integrity, applying sealant appropriately, ensuring proper clamp tightening, and maintaining weld quality are all necessary steps to ensure a sealed and efficient exhaust system. Neglecting these considerations compromises performance and poses potential safety risks.
6. Hanger Integrity
The structural soundness of exhaust hangers is an indispensable element when exchanging an exhaust silencing device. Hangers provide critical support, maintaining the position of the exhaust system and mitigating vibration. Compromised hanger integrity directly impacts the lifespan and performance of the newly installed component.
- Material Condition
The physical condition of the hanger material, typically rubber or metal, directly affects its ability to provide adequate support. Deteriorated rubber hangers lose elasticity and can crack or break, while corroded metal hangers weaken and may fracture under stress. The result is insufficient support, leading to excessive vibration and potential damage to the exhaust system. An example is a rubber hanger that has become brittle due to exposure to heat and road salts; it will fail to adequately cushion the exhaust system, transferring vibration to the vehicle’s frame.
- Mounting Point Security
The security of the points where hangers attach to the vehicle frame and the exhaust system is crucial. Loose or damaged mounting points compromise the hanger’s ability to maintain system alignment. This can result in increased stress on exhaust components and accelerated wear. For instance, a rusted mounting bracket on the vehicle frame can weaken, causing the hanger to detach and leaving the exhaust system unsupported.
- Alignment and Load Distribution
Correct hanger alignment ensures even distribution of the exhaust system’s weight. Misalignment can place undue stress on specific hangers, leading to premature failure. Load imbalance may occur if one hanger is supporting more weight than others, accelerating its deterioration. An example would be a situation where the exhaust system is shifted due to an impact, causing one hanger to bear the majority of the load, leading to its early demise.
- Compatibility with New Component
The hangers must be compatible with the size, weight, and mounting points of the replacement exhaust silencing device. If the new component is significantly heavier or has different mounting points than the original, the existing hangers may be inadequate. This can result in insufficient support and accelerated hanger wear. An example is replacing a small, lightweight original equipment exhaust silencing device with a larger, heavier aftermarket unit; the original hangers may not be strong enough to support the additional weight.
These factors highlight the direct relationship between hanger integrity and the successful execution of the muffler replacement. Assessing and addressing hanger condition, mounting security, alignment, and compatibility are critical steps in ensuring the longevity and optimal performance of the exhaust system following the exchange of the exhaust silencing device.
7. Tightening Torque
Proper tightening torque is integral to the process of exchanging an exhaust silencing device. Applying the correct torque to fasteners ensures secure connections that prevent leaks and component failure, directly impacting the performance and longevity of the exhaust system.
- Fastener Integrity and Material Strength
The applied torque directly affects the stress placed on fasteners and the connected materials. Under-tightening fails to provide sufficient clamping force, leading to loose connections and potential exhaust leaks. Conversely, over-tightening exceeds the material’s yield strength, causing fastener failure, thread stripping, or distortion of exhaust flanges. These scenarios compromise the integrity of the exhaust system, necessitating further repairs and potentially affecting vehicle performance. For example, exceeding the torque specification on a flange bolt can warp the flange, creating a persistent exhaust leak.
- Exhaust Leak Prevention and Seal Compression
Tightening torque plays a vital role in compressing exhaust gaskets and sealing surfaces to prevent leaks. Insufficient torque fails to compress the gasket adequately, allowing exhaust gases to escape. Excessive torque can crush the gasket, also leading to leaks or damage. The correct torque achieves the optimal compression, creating a gas-tight seal. For instance, the specified torque for the exhaust manifold gasket ensures a seal that prevents exhaust leaks and maintains engine efficiency.
- Vibration Resistance and Component Stability
Proper torque ensures that connections remain secure under the vibrations experienced during vehicle operation. Loose connections caused by under-tightening can exacerbate vibration-induced wear and lead to component failure. Overtightening, although seemingly providing increased security, can weaken fasteners and make them more susceptible to fatigue failure under vibration. Correct torque balances these factors, providing a secure and stable connection resistant to vibration. An example is the torque specification for exhaust hanger bolts, which prevents loosening due to road vibrations and ensures continuous exhaust system support.
- Serviceability and Future Maintenance
Applying the correct torque during installation facilitates easier removal during future maintenance. Over-tightened fasteners can become seized or corroded, making removal difficult and potentially damaging the components. Under-tightened fasteners may loosen over time, leading to safety concerns. Correct torque ensures that fasteners remain secure yet can be removed without excessive force during subsequent service. For example, applying anti-seize compound in conjunction with the correct torque on exhaust pipe clamps simplifies future exhaust system repairs.
Understanding and adhering to specified torque values during exhaust silencing device replacement directly contributes to a reliable, leak-free, and durable exhaust system. Proper torque application not only ensures immediate performance but also enhances long-term serviceability and prevents costly future repairs. The interplay between each of these factors contributes to the overall success of the replacement task.
Frequently Asked Questions Regarding Exhaust Silencing Device Replacement
The following section addresses common inquiries and concerns pertaining to the procedure of exchanging a vehicle’s exhaust silencing device. The intent is to provide clarity and guidance on various aspects of this maintenance task.
Question 1: Is professional assistance necessary, or can this task be performed by individuals with limited mechanical experience?
While individuals with basic mechanical aptitude can undertake the replacement, certain factors warrant consideration. Access to appropriate tools, a safe work environment, and a thorough understanding of vehicle safety protocols are essential. Complicated exhaust system configurations, seized fasteners, or a lack of experience may necessitate professional intervention.
Question 2: What safety precautions are paramount during the replacement process?
Securing the vehicle with jack stands is non-negotiable. Working under a vehicle supported only by a jack is inherently dangerous. Eye protection, gloves, and appropriate ventilation are also crucial to mitigate risks associated with debris, hot surfaces, and exhaust fumes.
Question 3: How can seized or corroded fasteners be effectively loosened?
Penetrating oil, applied liberally and allowed to soak for an extended period, is the initial step. Heat application, using a propane or butane torch, can assist in breaking the bond of corrosion. Impact tools, such as impact wrenches, deliver forceful torque to aid in removal. In severe cases, specialized extraction techniques may be required.
Question 4: What are the potential consequences of improper alignment during installation?
Misalignment creates stress on the exhaust system, leading to premature wear, leaks, and reduced performance. Undue stress on connecting pipes and welds can result in cracks or breaks, necessitating further repairs. Proper alignment ensures even weight distribution and prevents strain on individual components.
Question 5: How is the creation of exhaust leaks effectively prevented?
Inspection and replacement of worn or damaged gaskets is critical. Application of a high-temperature exhaust sealant at slip-fit connections can enhance leak prevention. Proper tightening of clamps, adhering to specified torque values, ensures a secure seal. For welded connections, weld quality must be assessed and rectified if necessary.
Question 6: What is the significance of hanger integrity, and how is it maintained?
Hangers provide vital support for the exhaust system, mitigating vibration and maintaining component positioning. Ensuring the material condition, mounting point security, alignment, and compatibility with the replacement component are key factors. Deteriorated or damaged hangers must be replaced to prevent excessive vibration and potential damage to the exhaust system.
In conclusion, successful exhaust silencing device exchange hinges on meticulous attention to safety, proper tools and techniques, and a thorough understanding of potential complications. Adhering to these guidelines contributes to a safe, efficient, and reliable replacement.
The subsequent section provides a glossary of terms commonly associated with exhaust systems and their replacement.
Conclusion
This exploration of how to replace muffler has detailed the procedural and safety considerations inherent in the task. It has underscored the necessity of proper tool selection, fastener management, component alignment, leak prevention, and hanger integrity. Furthermore, it emphasized the critical role of adhering to specified torque values to ensure a secure and functional exhaust system.
The information presented serves as a resource for informed decision-making. Adherence to these principles promotes a successful outcome, contributing to both vehicle performance and regulatory compliance. It is imperative that the information is applied with rigor and a commitment to safety standards for a durable and secure result.


![Muffler Replacement: How to Replace a Muffler Without Welding [DIY Guide] Best Mufflers for Cars & Trucks | Performance, Sound & Durability Upgrades Muffler Replacement: How to Replace a Muffler Without Welding [DIY Guide] | Best Mufflers for Cars & Trucks | Performance, Sound & Durability Upgrades](https://dnamufflers.com/wp-content/uploads/2025/09/th-767-300x200.jpg)
